Showing posts with label RomanTechnology. Show all posts

Friday, June 6, 2025

The Year in Roman Technology: "Unhinged" Secret Messages

People always ask, "What do teachers do during the summer?" Some actually work. In fact, I normally work at my school's summer camp. This year, I decided to take a breath and sit down. It's been almost a week now, and I'm about to go crazy. LOL. Kinda. I've always been someone who can't sit still mentally...well, or physically. I'm researching two really cool projects for next year so I thought I'd share what I'm learning, as I like to do.

ANCIENT CRYPTOGRAPHY!!!! A few years ago, one of my Latin/Science Olympiad students approached me to tell me about his cryptography club at the library. Intriguing. He told me that he had learned about the Caesar Cipher, an ancient mechanism whereby Julius Caesar, the 1st century Roman general, encrypted his messages during wartime. I had never heard of it! Of course, he told me everything he knew, and I furiously wrote it down...thinking, "OHHHH, this will be a GREAT RoTech unit!" I immediately thought of that time in DE BELLO GALLICO where Caesar sends a secret message to one of his men using a spear. I ALWAYS wanted to know how he did it.

Then, during spring break, by divine intervention, I'm sure, I ran across an online webinar about the Roman dodecahedron. Since we had talked about this little mystery device in my RoTech class, I decided to click the link. It led me to a tour company that sponsors professionals in many different fields to talk about topics related to their tour locations. It was here that I discovered a series of lectures on ancient Greek and Roman cryptography! These lectures, given by Dr. Martine Diepenbroek, discussed all kinds of ancient encryption. She talked about ancient encryption techniques, including the Spartan scytale which involved wrapping a message around a stick or spear. I immediately bought her book, The Spartan Scytale and Developments in Ancient and Modern Cryptography. She also mentioned a Greek author I had never heard of: Aineias the Tactician whose book on war tactics includes a whole chapter about encryption. I ordered that too! LOL

I've started reading these two works, and I'm having an absolute blast. Aineias, a 4th-century BCE Greek writer, wrote a work called How to Survive Under Siege. Lots of info here, but the most interesting chapter is all about hiding messages so that your enemy can't read them. If you're on TikTok, you've probably seen that trend where someone says, "Give me your most UNHINGED examples of blah, blah." Examples include nurses asking for ways to assist with difficult patients to teachers asking for ways to quiet a classroom. Well, this Aineias guy is something else!! Reading his encryption techniques is basically that TikTok trend: "Give me your most unhinged ways to hide a message that will evade the enemy!" Hold my beer: "Shave a slave's head, tattoo your message on his scalp, and then give him time to regrow his hair before sending him off." Like, WHUT??! "Scratch your message into a thin piece of lead, secretly slip it into the leather layers of a shoe heel, and then send off the shoe wearer. Unbeknownst to the shoe wearer while he's sleeping, the receiver of the message will retrieve the shoe, find the message, scratch his answer, and sew it back into the shoe."

Diepenbroek's work has been so informative as well. For example, I learned the difference between STEGANOGRAPHY and CRYPTOGRAPHY. In case you didn't know, steganography is "the practice of hiding a message within another message, an image, or an object, without giving the idea that a secret message is hidden in it." It's a broad term for LOTS of different types of messages, similar to the ones above. She also has a comprehensive list of ancient authors who use or talk about cryptography in their works.

I got so excited reading about these that I decided to try out the Caesar Cipher as a quick end-of-year activity with my students. I led them in creating a Caesar Cipher wheel, linked here. And then, they enjoyed decoding a few current brain-rot words that made them cringe like "THE RIZZLER". Their faces fell in true bitterness when they decoded BOOGER TOUCH - our favorite little game to play on Fridays. 


Diepenbroek's book mainly discusses the Spartan scytale, a method of encrypting messages using a particular size of stick (trust me, the lesson on this one is gonna be SOOO fun) and how it gave birth to the modern cryptography movement. I'm excited to read it because in the modern STEM world, teaching kids to code at all ages is the rage. I'm excited to connect this stuff to the ancient world of Greece and Rome!

I'm particularly interested in ancient cryptography right now because I'm so fortunate to be the recipient of the 2025 Classical Association of the Middle West and South's Benario Travel Award, a fellowship for travels to classical lands. Herbert and Janice Benario, the award's namesakes, are former Latin teachers from Georgia, but before she became a Latin teacher, Janice served as a code breaker for the US Navy during WWII! Check out interviews done with her here as part of the oral history project done by the National WWII Museum (in my home state of Louisiana.) What a connection!


I chose to use my fellowship to take an archaeological tour of ancient Provence (southern France). I've always wanted to see the Pont du Gard, a super famous Roman aqueduct and UNESCO World Heritage Site. But before I make my way south, I've decided to see the WWII sites on the Normandy Beaches, the Bayeux Tapestry, and Mont St. Michel. I can't wait to learn all I can about the work that Janice Benario did and many other codebreakers like her. Recently, I read Bruchac's Code Talker: A Novel about the Navajo Marines of World War Two. I also need to get hold of Kahn's Codebreakers: The Comprehensive History of Secret Communication from Ancient Times to the Internet. More secret messages to come!

Sunday, May 18, 2025

The Roman Shoe Project: Worn Down

Today, I saw a meme on Instagram that pictured a group of tiny students. They were sitting on a classroom floor in front of an interactive board. One little boy was standing up clicking a button on the screen. The text at the top of the picture said, "It's May. Teach yourself!" I admit to laughing because I understand that bone-tiredness that all teachers get as we spend these last few days of school trying to keep our sanity in rooms full of teenagers who are just as "done" as we are. Indeed, we are "worn down" like some old Roman leather shoes...

But I have a few things I want to wrap up before I walk off into the sunset:

THE ROMAN SHOE PROJECT: We finished out the year by wear-testing our shoes on different surfaces (concrete and tile) and in different conditions (wet and dry). We found that the laces of our shoes need to be really strong to withstand the wear of regular tightening and putting on/taking off. We only wore our shoes for approximately 5 hours. In just that time, some of them were falling off of feet. The bottoms of the soles got very rough with just a little wear. During our hydraulics unit that ended the year, we got our shoes a little wet as we constructed and tested aqueducts and shadufs. Wetting the leather made it stiffer. Overall, we predicted that our shoes might last a few months in all with constant wear. No wonder there were so many SUTORES (shoemakers) on sight in ancient cities and forts - Romans must have gone through a LOT of shoes.

The shoes will now go home with their makers. Some plan to hang them on their bedroom walls as mementos of the year, others are excited to show their parents, and some will be leaving them with me to serve as shoe examples for future classes.


Just this past week, I was excited to present our work on the Roman Shoe Project at the annual conference of EXARC, an international organization dedicated to exploring experimental archaeology. Since the conference was at the University of Curitiba, Brazil, I was not able to attend, although I thought about going. It was exciting to watch my pre-recorded presentation being played live via YouTube on the EXARC channel and see positive feedback on our process. While I'm sad to leave this project behind, I'm already cooking up a new class for next year.

HANDS-ON HISTORY: Now in the middle of my two-year Grosvenor Teacher Fellowship with National Geographic and Lindblad Expeditions, I've met so many amazing teachers who do super cool stuff OUTSIDE. My own experiences working on large outdoor projects with my students (like the Penelope Project and the Roman Road Project) inspired me to develop a class that meets and works outdoors entirely. Since I want the students to explore ancient cultures of Louisiana and other places in addition to the classical world, I decided to call it "Hands-On History: Wisdom of the Ancients." In this class, we'll focus on place-based learning, partnering with the Indigenous tribes of Louisiana, the Louisiana Division of Archaeology, and the newly-built South Branch of the East Baton Rouge Parish Library down the street from our school. We'll be building a school garden and composting area and exploring an oral history project about a sheep farm that inhabited the land where the library is located, among many other things. We will continue to explore archaeology and the artifacts that have stories to tell about the people who made them, used them, and owned them, whose voices have long ago faded away. I'm hoping to write a lot about our projects and all the new things I learn as I prepare.

Thursday, April 24, 2025

The Roman Shoe Project: Digital Footprints

Before I leave this project in the dust, I want to list sources we used to make our shoe project happen so that anyone else making the same endeavor starts out on the right foot.

#1 on any list about Roman shoes should be Dr. Carol van Driel Murray's writings. Her many articles about ancient leather and thereby shoes made this project possible. Fascinating and specific, it's an opus that anyone else can only dream of achieving. So grateful to her for all the knowledge she has imparted, I emailed her to thank her in February. She replied that our project had made her day...and sent me more articles. Even though she's now officially retired, she retains a working Webpage with linked articles that you can access for free. I know I say this a lot to the point of sounding like a broken record, but if you admire the work of a particular professional, reach out. They love to talk about their work and to know that it's being used.

The place to start with van Driel Murray's work is her chapter called "Footwear in the North-Western Provinces of the Roman Empire," in Stepping Through Time: Archaeological Footwear from Prehistoric Times until 1800 by Olaf Goubitz. His drawings of Roman shoes really explained so much. Her description of shoe construction in this chapter was very detailed and helpful. (At $75, this book is expensive, but totally worth it.)

Although I read a LOT by van Driel Murray before we started this project, the most interesting details I learned were:
1. The Romans invented vegetable-tanned leather. Before they arrived, leather as we know it today (tanned to preserve it) did not exist (and it was not found in the archaeological record). When they left northern Europe, the knowledge and technology of the process seemed to have gone with them until it appeared later in history.
2. Before the Romans, shoes were quiet. I had never considered this aspect of shoes before, and it was a bit of a revelation. Roman soldiers wore nailed shoes that made a lot of noise when walking - this style of shoe spread to other non-military shoe-wearers because of their durability, but they got interested due to the noise they made, kind of like an annoying advertisement. The study of soldiers and shoes goes hand and hand.

To learn more about the process of tanning leather, read her Chapter 19 in Oleson's The Oxford Handbook of Engineering and Technology in the Classical World (my RoTech Bible), "Tanning and Leather." An article I wanted to read but didn't get to was "Are we missing something? The elusive tanneries of the Roman period." In R. Thomson and Q. Mould (eds) Leather Tanneries: The archaeological evidence, 69–83. London, Archetype. You know how sometimes when you're studying something, your eyes are opened to a new world of joy...or as in this case, horror? That was my experience as I learned about the tanning process. Unfortunately, in some parts of the world, this process remains relatively unchanged from ancient times. This gruesome chemical process takes its toll on the lives of its workers.

In case you don't believe me about van Driel Murray's work, check out this bibliography of it. Yes, someone wrote an article about all her articles and chapters!

Next on the list of SUPER HELPFUL Roman shoe scholars is Dr. Beth Greene. A classical archaeologist at the Western University of Ontario, she has been a true inspiration for this project. Back in December of 2021, I watched an "Archaeology Abridged" lecture by her sponsored by the Archaeological Institute of America in which she spoke about the incredible archaeological finds at Vindolanda on Hadrian's Wall. I was absolutely TAKEN by this lecture. I mean, I knew about Vindolanda, but I was just not aware of its significance and its uniqueness. I subsequently joined in again for another lecture (this one sponsored by the Vindolanda Trust) specifically on the leather shoes found at Vindolanda. I also listened to numerous podcast interviews with Dr. Greene, and I started to amass the knowledge needed to begin the Roman Shoe Project. 

A couple of years later, I applied for and secured a teacher travel scholarship in which I designed my own tour of Roman Britain. Of course, I included Vindolanda, and it was there that by the most brilliant stroke of luck, I spotted Dr. Greene at the open-for-public-viewing archaeological pit at the site. She had literally just pulled the sole of a Roman leather shoe out of the actual ground!!! I introduced myself and told her about my planned project, and she actually got excited - she said that she and her research assistant, Cheyenne Eversole-Spina, were developing lessons on Roman shoes that my students and I might be able to help with. I was thrilled!

Even though the lessons never really got finished (Cheyenne got super busy with her wedding and finishing her dissertation), Dr. Greene was extremely kind to speak to my students not once but THREE times. In addition, when I showed up to a webinar about her new book (with Barbara Birley) 50 Objects from Vindolandathey sent me an advance signed copy with a lovely note inside: "Thanks for loving the Romans."

Dr. Greene's work was also very helpful:
1. She is the principal investigator at the Vindolanda Leather Project - she works at Vindolanda nearly every summer and is currently working on a book on Roman leather shoes.
2. The VLP contains this wonderful bibliography on Roman leather shoes.
3. This video of Dr. Greene explaining the different types of Roman shoes gave my students a solid overview.
4. Her article in Shoes, Slippers, and Sandals: Feet and Footwear in Classical Antiquity - "Metal Fittings on the Vindolanda Shoes: Footwear and Evidence for Podiatric Knowledge in the Roman World" hinted at an aspect of footwear that my students showed great interest in.

In addition to the people with knowledge of ancient shoes, I have to thank the shoemaker with the practical know-how. I was introduced to Martin Moser, a historical shoemaker and leather craftsman, on a Facebook group dedicated to historical re-enactment. His Website Res Rarae ("rare things" in Latin) is like looking through a treasure trove! I reached out to him via email, and he got back to me every single time. He was the one who suggested the simple carbatina for my students to recreate. I asked him countless questions about tools, patterns, leather, etc., and he never failed to share his knowledge with me with the greatest generosity. I even asked him to Zoom visit us, but he was nervous about his English speaking skills (he is Dutch). What a kind soul! I hope I get to meet him one day and thank him in person. 


You might be wondering, "Nathalie, did you call any shoe craftsmen in Baton Rouge?" And the answer is YES, I did, because I figured they would be able to help us, even though we were working on ancient stuff. But none of them ever replied to me.

As you can probably tell, I needed a LOT of help on this project. This project was a lot of fun, but it also caused me some stress. I was SO worried about actually getting our shoes made, but as with all our projects, we got it done. Stretching our brains can cause some stress, but in the end, our brains expand. My only regret with this project is that I didn't make MY OWN SELF a pair of Roman leather shoes, y'all!! I can't even believe it. I got so busy helping the students (in fact, there are exactly three pairs of shoes I will finish sewing for three kids who were sick during sewing time and still don't have their shoes)...that I didn't take care of my own two feet. Sigh...one day. Happy trails, Roman Shoe Project!

Wednesday, March 26, 2025

The Roman Shoe Project: The HEELing Art of Shoemaking

I asked my Roman Technology students, "How many people can say they know someone who's actually made a pair of shoes?" Before I realized my mistake, they looked around with sly smiles on their faces. One kid finally said, "Uh, I know about 25!"

Our shoes are finally done! We started in January, missed a lot of days due to weather, field trips, and special events, and finished right in time for the end of the 3rd quarter. It was a challenging project for some of my students who lacked the fine motor skills necessary for cutting and sewing, but my helpful students refused to let anyone fall behind.

On Monday, we ended our Roman shoe unit by reflecting on what we learned. Most students were most proud of themselves for learning to sew. It was their first experience with this skill. Many students mentioned how much they enjoyed this project because it gave them the freedom to be creative while spending time chatting with friends in their class as they worked. When asked to reflect on the lives of ancient shoemakers, the students used words like "tedious, physically hard, and stressful" to describe the experience. 

Our next step was to celebrate our shoes by having a fashion show. Of course, we had to use the Roman road as our runway. I mean, come onnnnn!! What better location?! For the show day, I asked the students to wear colorful socks so that they would show through the decorative punches in their shoes. It's thought that the Romans did the same thing in the colder climates of the northern empire.

Our next step will be to test the shoe construction on different surfaces. On some days we will wear the shoes to walk around our classroom and do normal tasks. On other days when we work outside (for our aqueduct STEM challenge), we'll be wearing them on concrete sidewalks. At the end of the 4th quarter, we'll look at wear patterns. To be clear, the Romans called these shoes CARBATINAE. They were meant to be worn as "slipper shoes" around the Roman house so we'll be stressing ours a little beyond their capabilities.


The Roman Shoe Project: SHOEperstars!!

Y'all!!! Our shoes are done, but before I share pictures of our runway sho(w)e (LOL, get it?), I wanted to talk about the long process of building before we slip on our shoes.

Step 1: Find a pattern.

My biggest fear about this project was not having a pattern for a shoe that we could easily reproduce. A shoe-making expert had sent me a picture of a pattern he uses, but a picture of a pattern is not a pattern. I knew I couldn't draw a pattern myself. I thought back to all the times I handled Roman shoe replicas at British archaeological sites in 2022 and wished that I had had the forethought to trace out one of those shoes into a pattern. But then in randomly searching around the internet, I found this simple pattern, and all my fears dissipated. I knew we could easily Romanize it, and I liked that it did not involve cutting out inner circles within the leather because younger students often have issues with cutting out intricate designs.

Step 2: Visit the experts in person.

My next biggest fear was ordering the right leather, but then I remembered my advice to others about a big project: go to the experts and ask them. Since the amazing Tandy Leather store that used to be on Government Street right near my school was no longer there, I visited the Tandy location in New Orleans. To be fair, few people today walk into a leather store and ask for advice in making 75 pairs of ancient Roman leather shoes so I wasn't expecting much help, but the Tandy expert was super knowledgeable and interested in our project. She showed me samples and gave me advice on what and how much to order. I'm so glad I took my own advice.


Step 3: Order the leather.

Put aside all feelings of your own personal vegetarian sadness and order the leather. This step really needs its own post because it was truly hard for me to learn about the leathermaking process. I became a vegetarian in the late 90s because I dislike the meat industry - it's bad for the planet, but I'll say this: after learning about leathermaking, I feel better for the animals (leather is really a byproduct of the much bigger meat industry), but I feel worse for the humans who work in it. More on this later...


Step 4: Receive a giant order of 8 leather hides.

After ordering our hides, I was shocked to receive them only a few days later out of Fort Worth, TX. Of course, they would come from there. Tandy Leather runs its headquarters out of Fort Worth, home of the Stockyards, a historic livestock market. The box was HUGE, and the hides, when rolled out, looked like...hides. I don't know why I was shocked by this. They were smooth and cool to the touch and had that leather smell to them. I ordered 4 black ones (dyed) and 4 natural ones (probably bleached a bit to give that buttery pale color.)


Step 5:
 Prepare the patterns.

Every student got a paper pattern to cut out and adapt to their feet. Kids with longer or wider feet had to expand the pattern a bit with extra paper and tape. Once done, they visited the leather cut-out station where I myself placed their pattern on the leather hides and roughly cut them out. This was the one job I felt I should do for them to make sure we used the leather wisely and did not run out. Our leather was expensive (a little more than $1000), and I wanted to honor the spirit of our leather.


Step 6: Trace the patterns.

Each student taped their paper pattern to their leather, and then they used a blue ink pen to trace their pattern on the rough side of the leather. (Not exactly Roman for sure, but we discussed how the Romans might have achieved this task.) This process was time-consuming. Once one shoe was traced, they flipped the pattern over, taped it down to the leather again, and traced it on their leather. This process allowed for a LEFT and RIGHT shoe pretty easily.


Step 7Cut the patterns out.

Oh my Zeus. This process seemed to take FOREVER - it happened around the time of the "flurricane" in Louisiana. When we returned from being out of school for a whole week, an endless stream of rescheduled events and special programs started up. Some days, only half the class was present. Some days, the whole class was present, but we only met for half the time. Some students can't physically use scissors. And yes, we learned that the Romans would have used very sharp leather knives to cut their patterns, but scissors were a much safer option for young students. Faster students offered help to students with less fine motor skills too.


Step 8: Tool the leather.

In this step, students punched holes in the leather to pass their laces through, but they also decorated their leather. Some chose punched designs that surprised me with their intricacy. Others used stamps. We had learned about the stamped shoe found at Vindolanda that touted the shoemaker's name.


Step 9: Sew the heels.

Most of my students had never sewed anything before. In fact, in the final survey for the project, most students wrote that they were proud of themselves for learning to sew, a skill they knew nothing about until this class. Sewing leather can be complicated if the holes are not big enough for the needle to pass through as leather is sinewy. The Romans would have used animal sinew to sew their shoes. I had ordered some that I hoped we would use for this process, but the combination of teaching novice sewers to sew with a tricky "fabric" conquered my dream of authenticity. I ended up punching through every single pair of shoes with a multi-pronged awl to speed the process. Did my arm nearly fall off by the end of that day? Yes. Did it get the job done? Also yes. It's times like these that really help me to understand the physical work of ancient craftspeople. Once the heels had holes in the right places to allow for a flap fold in the pattern, students who picked up sewing more quickly had their shoes in no time at all. They volunteered to help their less experienced friends too.

Step 10: Lace the shoes.

This step went so quickly. In fact, I passed off my job of cutting leather straps to a "lace expert" student while I helped with sewing. As soon as heels got sewn up, it was nearly impossible for the students not to try on their shoes right away. As they would prance over with the shoes all laced up on their feet, I squealed nearly every single time. I seriously wanted to cry.


Step 11: Tighten up the fit.

The beauty of this pattern is that it can be fit to any crazy-sized foot - slender, double-wide, super long. The lace in the front was easy to adjust.


Wednesday, February 19, 2025

The Roman Shoe Project: A Guest Speaker from Left Field

At the beginning of the school year, our school district asked all teachers and students to take a RIASEC assessment. I had never heard of RIASEC before. In case you haven't either, it's a personality test based on the work of mid-century psychologist John Holland who believed that people are happiest when they have jobs that align with their personalities. I was none too surprised that I tested as a SOCIAL person, one who enjoys helping others and teaching. If you want to see the other categories and their matched careers, you can look here. Because Louisiana graduation rates are some of the lowest in our country, our district likes its middle schools to introduce careers to our students whenever we can. I must admit, I didn't seriously think about what I wanted to be until I was in college. I wish I had met an archaeologist sooner. It may have changed my mind...

That's the idea behind my principal's push to get professionals in our classrooms whenever we can - get kids thinking. So when I asked my Facebook friends who work with leather if they would consider to talking to my students, I got an unexpected surprise. My former colleague's husband runs a wonderful business called "The Glove Doctor." Chad Chenevert repairs leather baseball and softball gloves! And he was SO gracious to visit with my students to talk about his work.

Did you know that leather gloves can last for the entire career of a player? Did you know that they can cost 100s of dollars? Here's one you probably knew, but I'm just so out of this loop that I didn't know. Gloves are specialized based on the position of the player! It makes total sense, but I really didn't know that. You can probably tell that I love to learn about pretty much everything. In addition to all this cool information, Chad presented to the kids on the history of baseball gloves and even talked about leather tanning too. Then, he told the story of how he got into fixing gloves for his son's teammates and eventually for LSU players and even some professionals. 

After the kids asked him a million questions, Chad showed the kids some of the tools he uses to repair gloves and condition new ones. They loved this wooden mallet, used to break in new gloves. He also let them look at the different colored leather cord available for stringing gloves. Some players like to get their gloves strung in the colors of their school.

Overall, it was fascinating to see that the tools Chad uses to work with leather are nearly the same as the ones used by ancient shoemakers: awls, knives, needles. Chad's wife Michelle, a tech guru at my old school, made the above image for us using AI. The kids got the biggest kick out of it, but I thought it was perfect - even though the Romans would not have used baseball gloves, it's a great reminder of the similarities between ancient and modern leatherworking.

Asking working adults to spend half a day away from their work to talk to my students is hard for me. I honestly hate to do it because I know that everyone is busy, but I have never had an adult say that they didn't enjoy sharing what they do with the students. And the kids had a blast learning about this unique work. 

Thanks a million to Chad for being so generous with his time and knowledge. If you need a glove doctor, he should be your first stop.

Monday, February 17, 2025

The Roman Shoe Project: Baby Steps with BULLAE

With all the fascinating information out there about ancient Roman leather shoes, I knew that I would have plenty of lessons to share with my students. But, we needed to start small so the kids could learn how to work with leather and its traditional tools.

Our first project was making our own Roman bullae. These ceremonial necklaces were given to children at age 9. The archaeological record gives us numerous ones made of gold and goldplate, but a couple of Roman authors refer to ones made of leather. You can see our notes on these (and some pictures in this slide deck). Female students were happy to learn of the existence of the lunula, given to girls with the same purpose in mind.

My first step was to create a pattern for both shapes so that students could choose either one (you can see that pattern here). Although ancient children would not have had a choice, ancient children would not have been making their own leather bulla either so I figured why not? I had several students choose the opposite shape because they simply liked the way the shape looked. They also needed practice with tracing a pattern since most students had no sewing experience. For this project, we used thin-tempered (pliable) chrome-tanned scrap leather that is available from craft stores for very cheap (this bag is only $10).

From the get-go, I knew that I would not be teaching my students about leather-working knives because they are a bit too sharp for my liking. I don't normally shy away from sharp tools (my students are learning how to use awls, for example), but knives seemed a step too far. Thus, we've been practicing with scissors. And if you're using scissors in your classes, I hope you're training your students how to walk safely and slowly when retrieving these for use. Before we began this unit on leatherworking, I had each of my students take notes on the different tools and how to use them safely and then commit on paper with a safety pledge. Advice from someone who uses tools often in class - never skimp on safety.

After tracing the patterns onto leather, the students got to work on cutting them out. The next step was to learn how to use leather punches and awls to make holes where the bullae and lunulae would be sewn up around the edges. They folded the pattern over so that their holes would be in the same spots on both sides of the leather. Did they do this properly? Not in all cases, but this was part of the reason why I wanted them to practice on a smaller project first...before we use expensive leather for our shoes.

Next, the students had to sew their leather necklaces shut. Did students need lots of help threading needles and using thread? Of course. Did that stop me from doing this project? Nope. Some projects test my patience and that of my students, but is that a deciding factor? Nope. Students (and teachers) need to practice patience and resilience.

Last, the students chose special objects to put in their necklace pouches. One student chose a silver dollar his dad had given him for good luck. Another chose a crystal he had been keeping on his desk at home. I wish we had more evidence about what the Romans put in theirs.

All in all, this project was a good one to introduce the students to simple leather working tools and techniques. It also yielded wearable items! I see my students wearing them all the time as if they are super proud of them. As they should be.


Note to teachers looking to replicate this project, but without the tools or actual leather: former Latin teacher Ginny Lindzey has a great lesson on it posted on her Website in which she uses foil to recreate the bullae.

Sunday, February 16, 2025

The Roman Shoe Project: Stepping into Hands-on History

I've been MIA from blogging for the past couple of months because this project has demanded my full attention. We have really been busy. Let me start from the beginning!

During the pandemic, I became a huge fan of watching online lectures by archaeologists. The Archaeological Institute of America offered (and still does) monthly lectures for free, and it was at one of these that I learned of the leather collection at the site of Vindolanda on Hadrian's Wall in northern England. Dr. Elizabeth M. Greene spoke about the Roman shoes that she has excavated through years of work there. She explained that the soil of Vindolanda is particularly anaerobic and preserves leather very well. Archaeologists have found hundreds of shoes at this site, once a fort and town on the edge of the empire. Some of the shoes, found in a waste area of the town, had been discarded by those moving on to other places. Some may have been lost. Some were found with their twin. I was intrigued by these shoes and the stories they might tell us.

Shockingly, the shoes look almost modern. It's pretty easy to see how they were designed and tooled. I immediately began thinking about how I could incorporate ancient leathercraft into my Roman Technology classes. In years past, the students have made their own leather bullae, or childhood protective amulets. They used small leather punches to make holes in scrap leather I purchased, and then they sewed the little pouches shut with twine, enclosing a special tiny object for themselves before putting on their necklaces. "Could we make shoes too?" I started to wonder.

In the summer of 2023, I was fortunate to receive a travel scholarship from the National Latin Exam. I designed my own trip to Roman Britain, and of course, Vindolanda was on my list. I wanted to see its famed shoes myself! You can peruse my collection of leather shoe photographs here.

When I arrived for my visit to the archaeological site, I was touched to see this sign at the entrance. It REALLY got me thinking about studying shoes. The old adage goes, "Before you criticize a man, walk a mile in his shoes." My students can learn deeply about the daily lives of the Romans we study by recreating their shoes.

Most information about the classical world comes from literature written by wealthy, upper-class male citizens. They had the time and resources to write about their lives. But what about the others? Women, children, enslaved people, craftspeople? I want my students to learn about them too. Hands-on history projects like creating leather shoes allow students a window into the daily lives of people whose voices aren't often heard in literature.

So, can we do it? The students will be learning about the sources of leather in the ancient world, about the tanning process, about the craftspeople who made shoes, and about the people who wore them. We'll then design and craft our own Roman-style leather sandals or boots before experimenting with their use in our daily lives. We'll be making "footsteps into the past."

Thursday, December 19, 2024

This Year in Roman Technology: Celebrating the End of the Semester with Food Technology

When I told my students that we would be studying Roman food processing and technology, they were super excited. Teenagers like to eat! It all started way back a the beginning of the semester, and nothing went as planned.

Way back in August, after we painted, crashed, and then reconstructed little gardening pots to learn about potsherds in archaeology, we decided to recycle our pots for growing seeds. We had a plan in place to grow Roman herbs that we could use for our food unit in December. It all started with a book I had picked up in England when I visited in 2023 to do a self-directed tour of Roman Britain (see my Website here). Ryley's Roman Gardens and Their Plants intrigued me because not only were the illustrations beautiful, but they also contained information about the uses of each plant and their origins. I've also long been a fan of archaeologist Wilhelmina Jashemski's plant root casting in Pompeii. If you haven't heard of her work, look here for fascinating information about how archaeologists identified plants long gone from the gardens of ancient Roman cities. Before we ate Roman food, I wanted the students to have a little bit of information about how the Romans grew that food. What better way to learn than to do!

After a short presentation on Roman gardening (in which I told the students that to remain authentic to Roman methodology, I had saved my poop to use as fertilizer for our project - don't worry, they only believed me for a few seconds until I couldn't hold back a smile), the students used their pots to plant celery, parsley, fennel, oregano, thyme, sage, basil, etc. Here's where the plan went awry. A certain woodworking volunteer (who may or may not have been my dad) was supposed to deliver some raised gardening beds to our school. Unfortunately, he didn't get them to us in time before our little sprouting seeds died. Luckily, at this time in the year, my students were caught up in catapult design so they weren't too disappointed.

Seeds sprouting into Roman herbs


We picked back up with our food unit in late November in a lesson on wine production and tasting. Now...before you think I actually serve wine to middle school kids, just know that I tell them to tell their parents that. Just for a laugh. We use grape juice. I make mulsum (honeyed wine) by boiling the grape juice and dissolving the honey into it. Which reminds me...have you ever read Apicius' recipe for mulsum? The amount of honey needed boggles the mind and has to be wrong, but I digress. Recipes are a great way to introduce the students to the Apicius tradition.

After a lesson on wine production technology, the students taste the "wine," to which we add different seasonings found in Apicius: pepper, coriander, and toasted barley. The students really enjoy this experience because they think peppered wine will taste terrible. (It doesn't!) I grind the ingredients fresh in my classroom mortar and see if they can guess what they are by the smell. How many lessons do we teach where the nose and the tongue do the learning? Not enough!

Next up, it's Roman bread - so many archaeological sources for bread and grain grinding technology! And I can't write this post without thinking of the amazing Farrell Monaco, experimental food archaeologist, who has covered panis quadratus and many other ancient bread recipes and techniques. You should read her blog regularly if you're interested in exarc. For our lesson, we followed her recipe for Cato's grape must biscuits.

A ball of Cato's grape must biscuit dough


Since I wanted to have the kids create their own food as much as possible, I had to divide up the recipe into 25 parts per class. I'm glad I enjoyed math as much as I did in high school and college - I needed it! It was around this time that my classroom sink decided to be clogged which required us to take not one but two trips to the hall bathroom for hand-washing sessions. It's times like these that I'm grateful for our custodian, Mr. Chris, who is the G.O.A.T. anticipating what we need to make our classes work. Before mixing our ingredients, we studied the harsh conditions that enslaved people and animals endured in the grain mills. To see what grinding grain was like, the students ground different grains in mortars with pestles - not exactly like the ancient method, but the hardness of the grain was a surprise to them. We used a little of the ground-up grain in our biscuit recipe.

Grinding grain is hard work.


Our next lesson was all about Roman bread ovens and how they worked. We studied the Tomb of the Baker and ovens that were excavated in Pompeii. It was then time for the most exciting lesson of the unit: baking our biscuits in hand-made ovens. I learned to make these surprisingly effective cardboard ovens in Girl Scouts - they work SO well. The kids lined the inside of large copy-paper boxes with foil to protect the cardboard from heat. Then, we placed metal pie pans filled with charcoal underneath them. Over the charcoal, we rested the biscuit pans on recycled soda cans filled with water (for weight). If you've never seen one, take a look at this video. The simple technology in these ovens simulates the Roman ones easily. Parents helped to get the charcoal lit and ready to go while the students prepared their biscuits for baking. We had SUCH a good time! But we weren't done learning.

Baking Cato's grape must biscuits in our cardboard ovens.


Our last lesson was one I adapted from a participant in last summer's nerd camp: The Ancient Olympics and Daily Life in Ancient Olympia: A Hands-On History. I co-directed this K-12 Summer Institute sponsored by the National Endowment for the Humanities last July, and one of the best things about it was inspiring and guiding the teacher participants in developing their own hands-on history lessons. One of those participants, Catherine Daun of Cicero Preparatory Academy in Scottsdale, Arizona, did a wonderful lesson on Roman cheesemaking. I enjoyed it so much that I promised myself I'd use aspects of it in my Roman Tech class this year. It was a perfect addition to our food unit! Making the cheese was so much easier than I expected - basically, boil some milk and then add vinegar as a coagulant at the end. The curds appear as if by magic, floating to the top of the whey. After learning about Roman cheese-pressing technology, the students pressed their own cheese right in class before seasoning it and eating it on their biscuits. 

Squeezing some cheese


Now, I'm sitting here watching them take a short test on our food unit. They had to write about what foods and drinks they would serve at their own Roman dinner banquet. It was a scene! We now transition to our big experimental archaeology unit on ancient Roman leather shoes, starting in January. I'm almost too tired. Almost.

Tuesday, November 26, 2024

Can You Dig It? An Evening of Hands-On History and Archaeology

As a kid, I was obsessed with paleontology and archaeology. I kept a human femur in my bedroom and dug up the dental tools discarded by an ancestor behind my grandparents' hundred-year-old house. I collected road kill skeletons of animals whose lives ended along the busy road in front of my childhood home. I read the Childcraft dinosaur volume over and over again. After my dream of becoming an archaeologist was killed by my mother at the age of 10 (a famous story in our family), I became a teacher. And it's always been an unspoken goal of mine to get students interested in archaeology. Every August when I teach Roman Technology, I begin the year with a unit on archaeology. You can read more about that in this blog post.

When I became a Grosvenor Teacher Fellow with National Geographic and Lindblad Expeditions, I knew I would have a unique opportunity to bump up this effort even more. Thus, this year we are doing a book study of Mark Aronson's If Stones Could Speak: Unlocking the Secrets of Stonehenge, the story of an unlikely pair of archaeologists who make a ground-breaking discovery about this famous UNESCO World Heritage Site. Each time we read a chapter together, the students reflect on what they've learned in their National Geographic Explorer Mindset journal, that I created so that my students can document their learning about travel.

We are also planning a trip to Poverty Point, Louisiana's only UNESCO World Heritage Site. I wanted my students, many of whom have never traveled outside of Louisiana, to explore the world through national parks and UNESCO World Heritage sites. I've also been holding training meetings to get my students ready for travel - how to visit a museum, how to use your phone appropriately, how to travel on a boat or plane, etc. If you've never done these things, you need to learn. I didn't fly on a plane (not counting returning from my dad's military service in Hawaii as a 2-year-old) until I was 22. I want to be sure that my students have the most successful travel experiences so that they will want to continue traveling after this year. Our trips will be happening in March and April so expect more information on our preparation and experiences in a future blog post.

When my students learn new things, they get excited, and I like to harness that excitement by challenging them to act as "presenters" at outreach fairs. These fairs serve two purposes: 1. they validate the knowledge that my students have acquired as they practice sharing it, and 2. they work as outreach initiatives to younger children (and adults) - who wouldn't want to study archaeology or classics when learning how to play an ancient game or excavate a tiny archaeological site? I've done big outreach fairs for the past three years by partnering with our local Louisiana Art and Science Museum in downtown Baton Rouge for All STEM Leads to Rome. My students act as presenters at learning stations that center STEM activities from the ancient Roman world: mini-catapults, ancient ink, Roman tic-tac-toe, bridge designing and arch building, and arranging stone mosaics. The kids really enjoy it, and many use it to add service hours in organizations like Beta Club.

My fellowship with National Geographic asks that we sponsor a student-led outreach event so I thought that adapting this already popular and fun fair into an archaeology outreach one would be a perfect way for my students to show off their knowledge and get the community involved. Planning started in August when I asked our state Division of Archaeology to partner with us. If you're a classics teacher who hasn't already called your local division to visit your classroom, WHY NOT? Sometimes, they even have an archaeologist who is also a classicist. Classics has so much to learn from archaeology. Ask me for more info if you need it.

I also applied for an archaeology outreach grant from the Archaeological Institute of America. We received $500 from this organization which will pay for all our expenses. We'll also be able to reuse many of these items for our next event coming up in April. I thank them MIGHTILY for their support!

After getting our local archaeologists on board, my students requested what they wanted to showcase at the event. I wanted the activities to reflect the skills and jobs of archaeologists. So, In addition to tried and true hands-on history activities such as arch building, mosaics, oak gall ink and papyrus, and rota game boards, they added the following:

1. WHAT IS THIS THING? One of my students has a 3-D printer and printed dodecahedrons for visitors to handle. After giving them a little archaeological information about these mysterious objects, visitors were asked to guess what they were used for, write down their answer and phone number on a card, and put them in a box. We drew from the box for prize winners during the event. Visitors LOVED this activity.


2. POTTERY RECONSTRUCTION The students decorated little terracotta flower pots with black sharpie markers to mimic ancient pottery. We then broke them into sherds. The students helped visitors put them back together using tape.

3. UNESCO WORLD HERITAGE SITE MATCH The students picked famous sites that most visitors would recognize. We created a board for them to match up the pictures to the countries where the sites were located. Anyone who matched them up correctly got their names put in a box for a prize pick. Simple but effective!


4. ZEUS PHOTO BOOTH We had planned to have just a photo booth with National Geographic yellow rectangles to use for frames, but my students went harder. I had crocheted a Zeus beard last year to make the kids laugh, but one student asked if he could BE Zeus and pose with visitors. I thought this was a FANTASTIC idea and approved it. He wore an old toga I had made years ago. We combined the photo booth with a vintage National Geographic magazine giveaway station where visitors could peruse donated magazines and take one home with them to read.


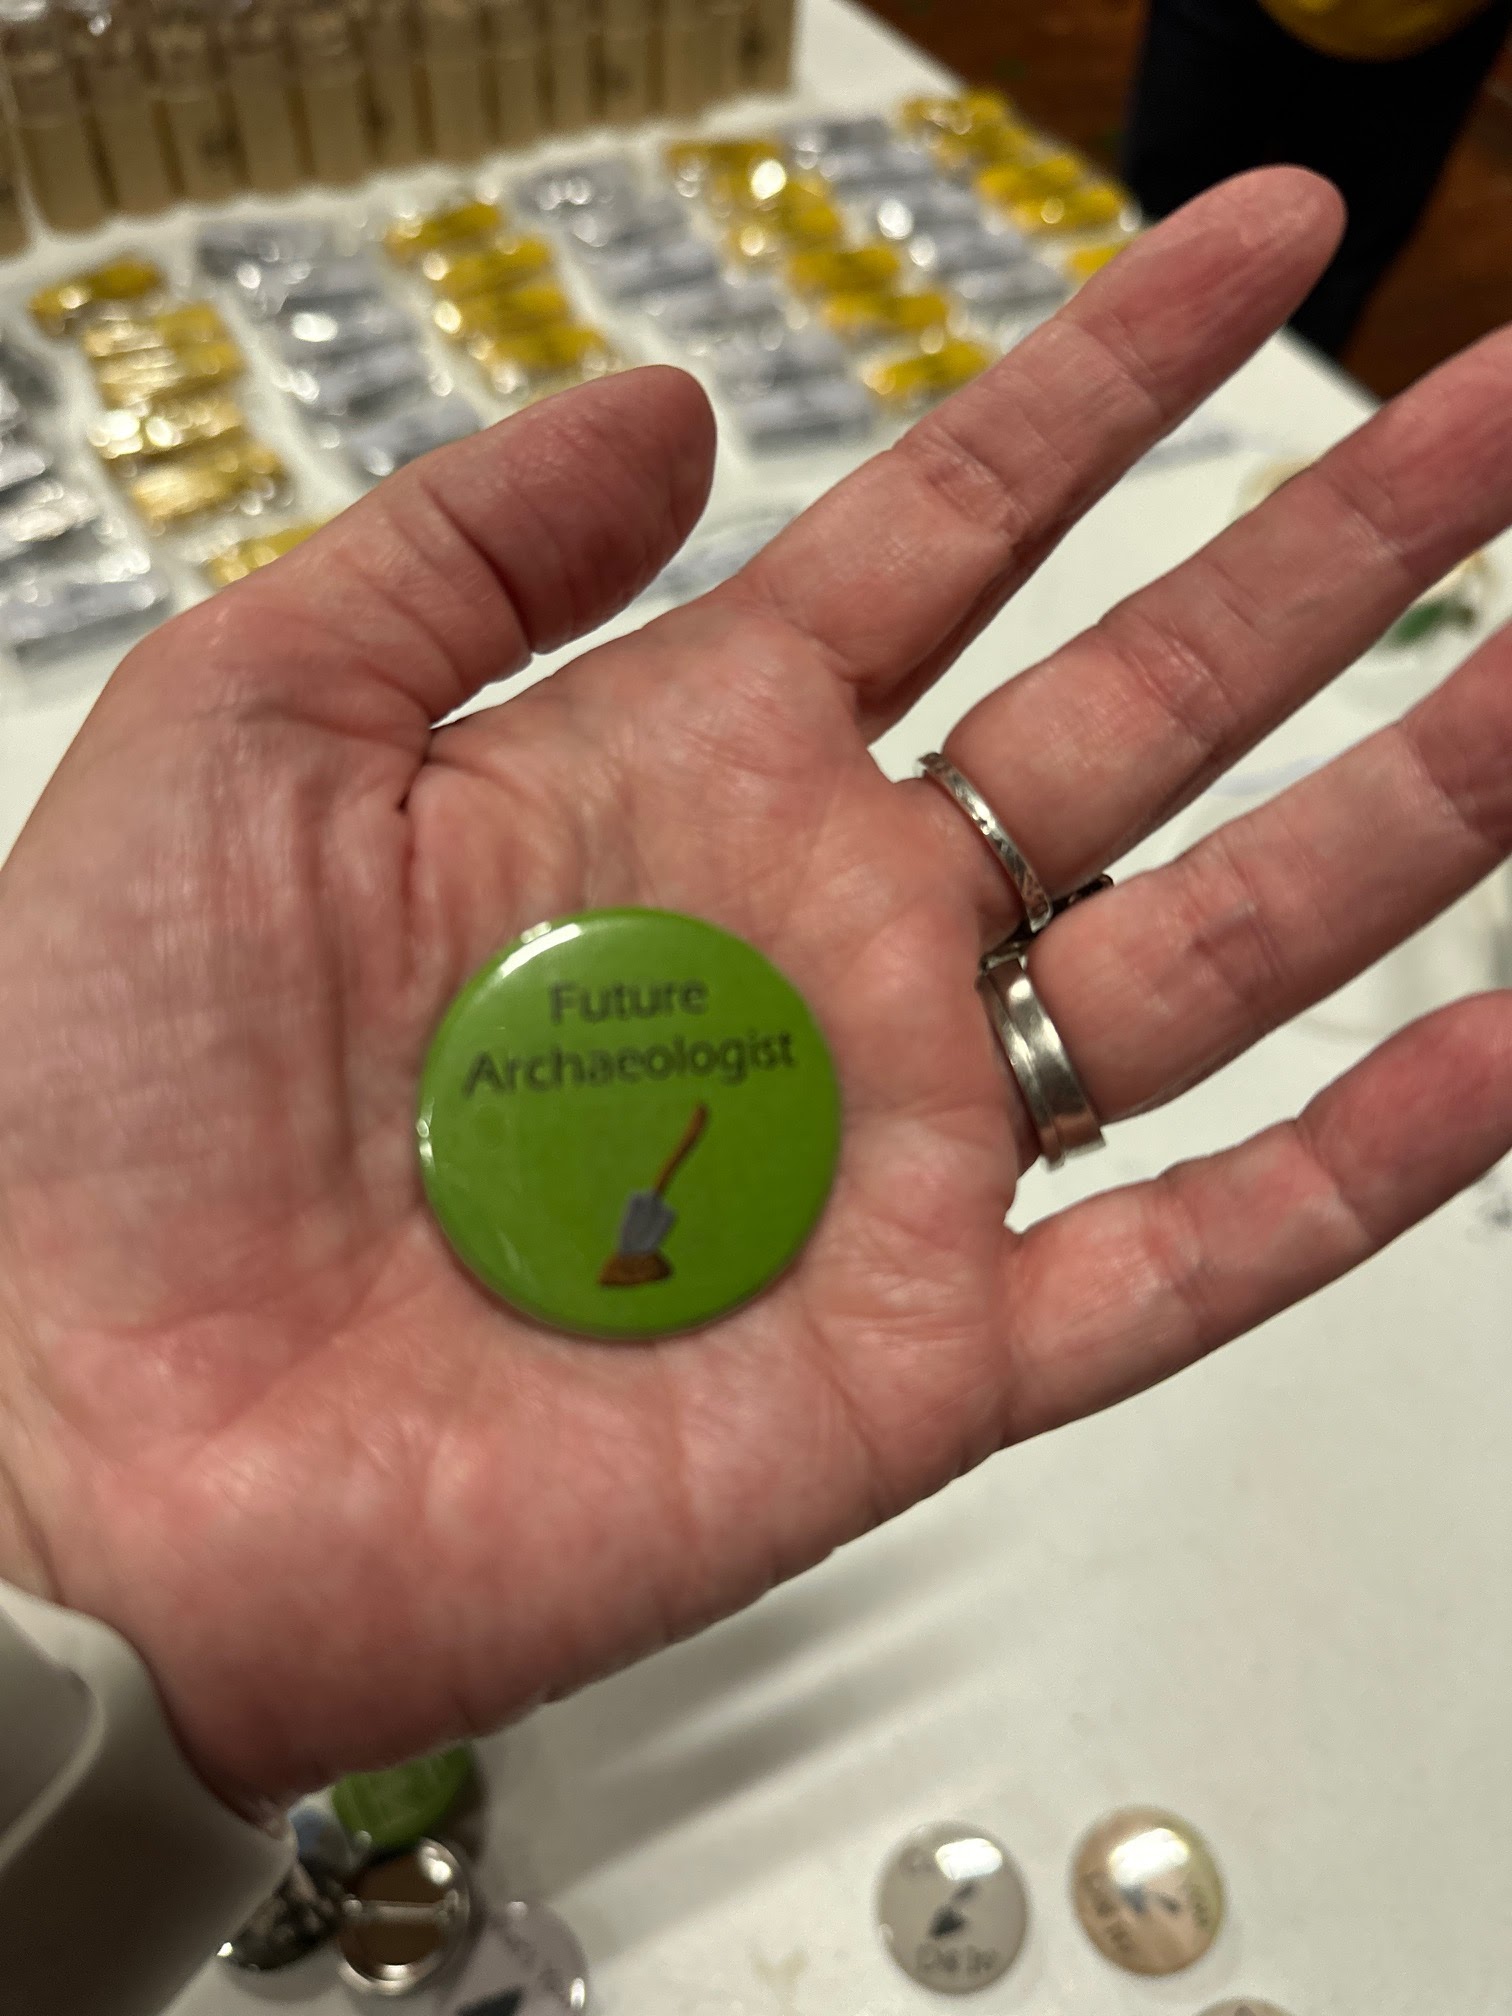
Add to these activities the amazing booth that the Divison of Archaeology arranged. The education outreach director, Mrs. Josetta LeBoeuf, and her assistant developed two activities for this event. One invited visitors to create sand art to learn about archaeological stratigraphy - BRILLIANT, and very popular with the kids. In the other, they adapted the tried and true "dig box" excavation by using tiny boxes preloaded with "artifacts" (tiny objects) hidden in dirt and mulch. They spread plastic tablecloths on the floor so that messes were easily cleaned up afterward. It was AMAZING! They also brought along lots of free archaeology merch like pins that said "Future Archaeologist," coloring books, and fold-up meter sticks.

We held the event in our school gym from 5 to 7 PM, and we hosted about 150 people (excluding the 55 kids that participated). Our librarian also hosted a night of shopping at the annual book fair in the nearby library. Many families brought younger siblings and other random children. The prize giveaway really rocked everyone's world too. We gave a prize about every 15 to 20 minutes. I stood in the middle of the gym with my mic on and announced the winner. Everyone would clap and scream. The child would run over and give me a hug before proceeding to the prize box.

The final prize, an arch block-building kit, was given to a child who had completed our passport system. The students helped me design and fold special little book passports which you can see a video of here. This system incentivized attending all the stations. Each station had a spot in the passport book to get stamped. These also gave us a way to contact families who attended so we could get feedback from them about the event.

On the day after the event, my students and I spent time talking about how to improve it, whether we wanted to do it again, and what other themes we might incorporate in the future. They immediately seized on the idea of having a mythology outreach fair with a table for each Greek god and an activity related to that god. Students really do enjoy sharing what they learn. I was so touched to have a parent reach out and say that she was proud of her son for being Zeus and that this meant she was a queen now. LOL. A school board member attended with her children and raved about how impressed she was by the students. Feedback was very positive - all attendees gave us 5 stars. One said, "The stations all appealed to a wide age range of kids. There were lots of activities and the presenters were engaging and informative." Another said, "I feel like this is exactly the kind of event schools should be offering to the community: a variety of activities, accessible to all ages, learning while having fun, all of it hands-on and interactive. The presenters took their roles so seriously and were so impressive! The enthusiasm for the subject was palpable, and everyone seemed to have a great time." Here's to many more!  
Kids love putting together a Roman arch!


Writing on papyrus with oak gall ink.


Putting together a Solomon's Knot mosaic.


The merch table!


The magazine giveaway table


Weaving a New Version of the Odyssey

Have you seen Nolan's The Odyssey ? I got to see it on opening night in lil ole Galesburg, Illinois, at the end of a two-week K-12 Summe...